Enterprise bank transfers
From enterprise verification to a dedicated organization transfer account, bank payment, and automatic balance crediting.
Enterprises can fund an organization by bank transfer. Once enabled, the organization receives a reusable dedicated beneficiary account with no expiry. Finance staff can save it in online banking and transfer any amount. Funds are automatically credited to the organization’s balance on receipt; no order is needed before each transfer.
The process has five steps:
| Step | Where | Who |
|---|---|---|
| 1. Enterprise verification | Personal space → Account Settings → Identity Verification | Organization lead |
| 2. Create an organization | Account menu at the lower left → Create Organization | Organization lead |
| 3. Open a dedicated transfer account | Organization → Finance → Add Funds → Corporate Transfer | Organization owner / administrator |
| 4. Transfer funds | Enterprise online banking or a bank branch | Enterprise finance staff |
| 5. Confirm crediting | Organization → Finance → Order Details / Ledger | Organization owner / administrator |
If your organization was already created by an enterprise-verified account, start at step 3. Screenshots contain fictional demonstration data, not real accounts or transfers.
Preparation
- A registered platform account with a linked phone number. The account that creates an organization becomes its owner.
- Business-license details: enterprise name, Unified Social Credit Code, legal representative name, and legal representative identity card number.
- No business-license or identity-card photos are required.
Step 1: Enterprise verification
Creating an organization requires enterprise verification; personal verification is insufficient. See enterprise verification for capabilities, failures, and verification-type changes.
Open identity verification
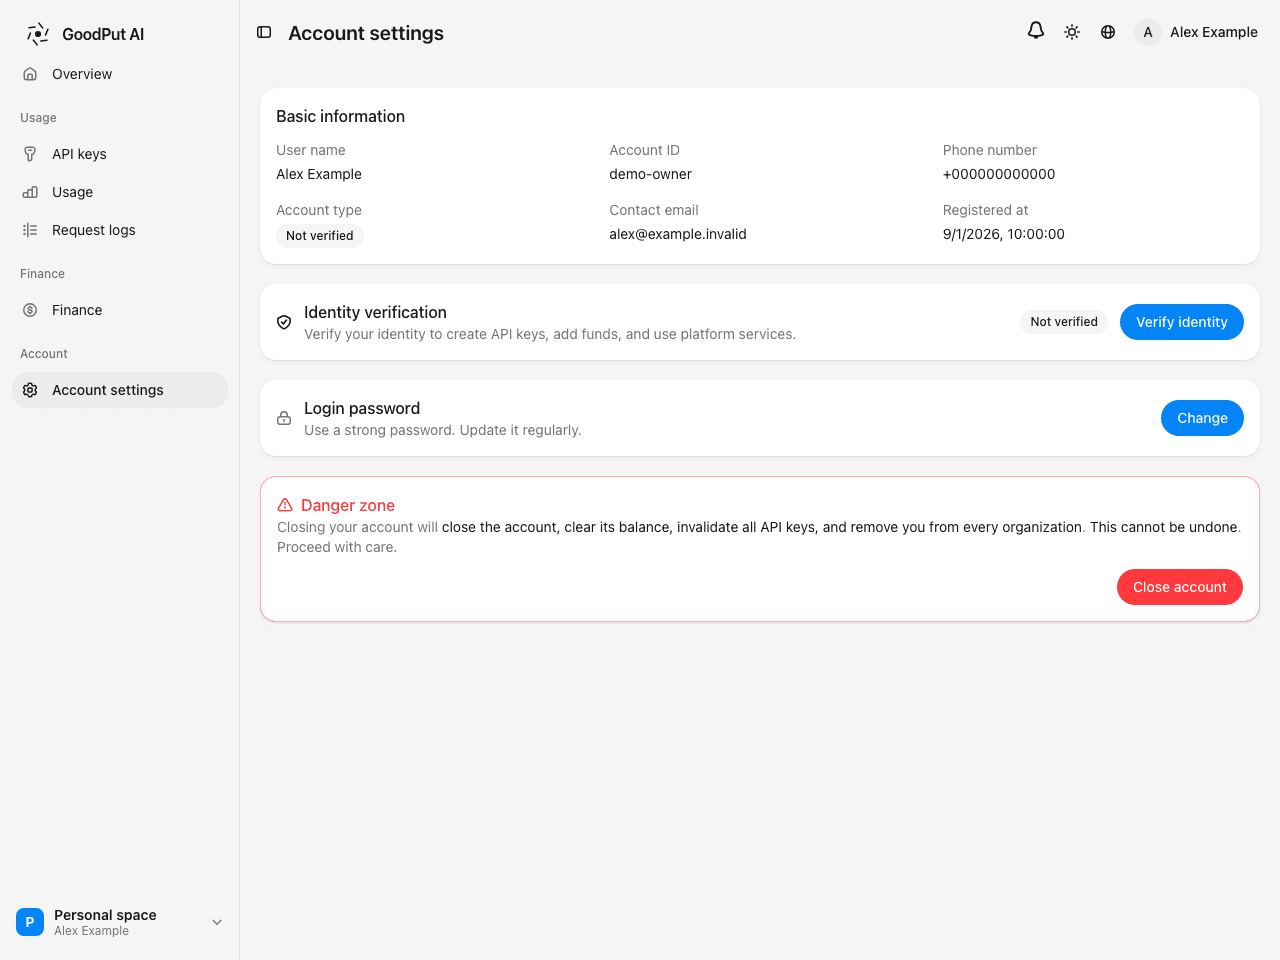
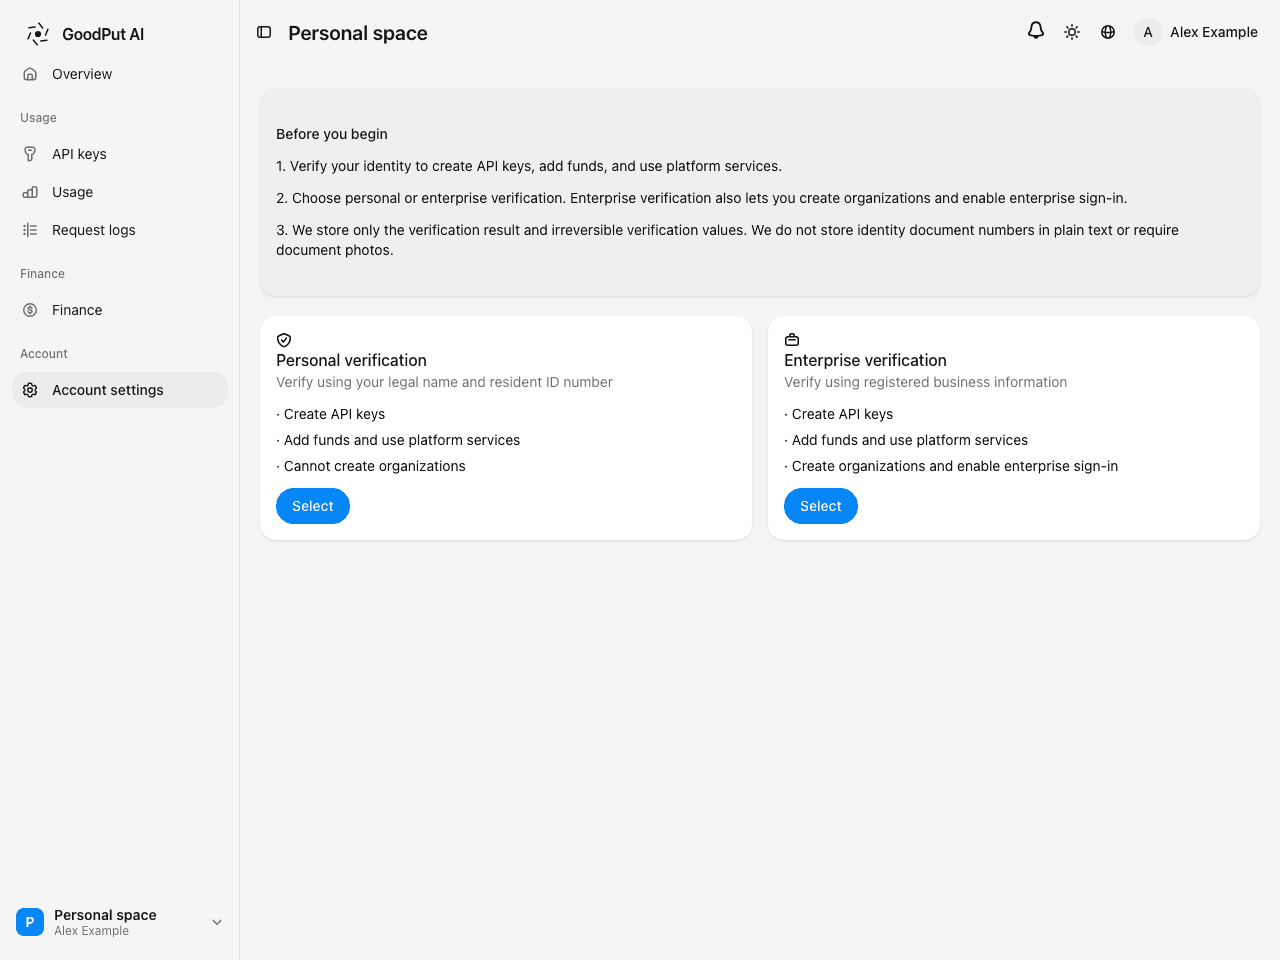
Select Account Settings in the personal-space sidebar, then Verify Identity on the Identity Verification card.
Enter enterprise details and submit
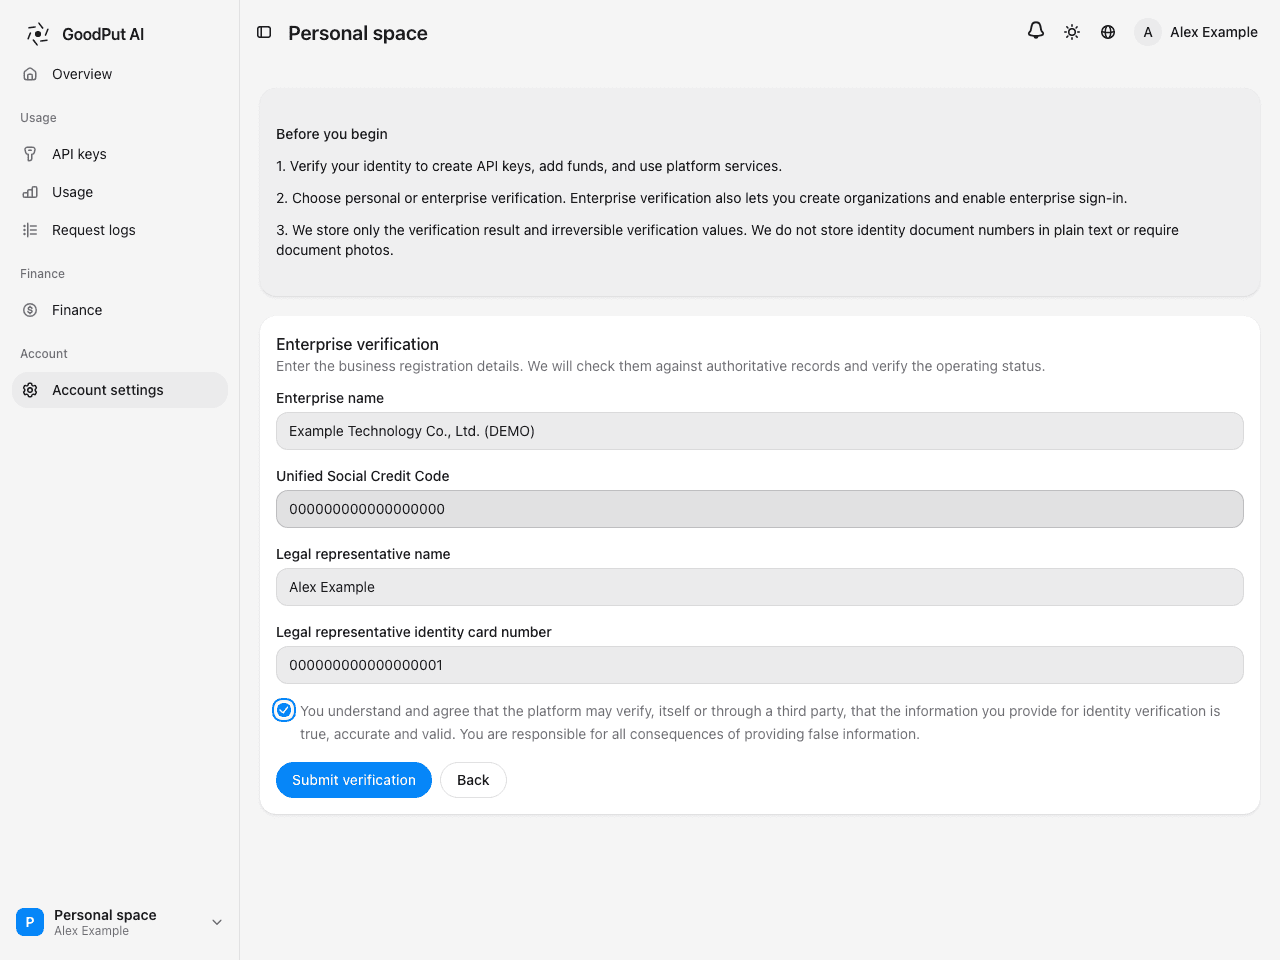
Enter the four details, authorize verification, and select Submit Verification.
| Field | Requirements |
|---|---|
| Enterprise name | Exactly as on the business license, including parentheses and spaces |
| Unified Social Credit Code | The 18-character code on the business license |
| Legal representative name | The representative named on the business license |
| Legal representative identity card number | The representative’s 18-character identity card number |
The platform checks the four details and the enterprise’s operating status against an authoritative source. Results are returned immediately:
- Information mismatch: at least one detail differs from registration records. The message does not specify which one; check each field and resubmit.
- Information not found: the source currently has no record for the enterprise. Repeated submissions will not change the result; check the details or contact support.
- Business status unavailable: the enterprise is deregistered, revoked, or suspended and cannot be verified.
Verification complete
When the page shows “Your enterprise identity is verified” and the verification details, continue to the next step.
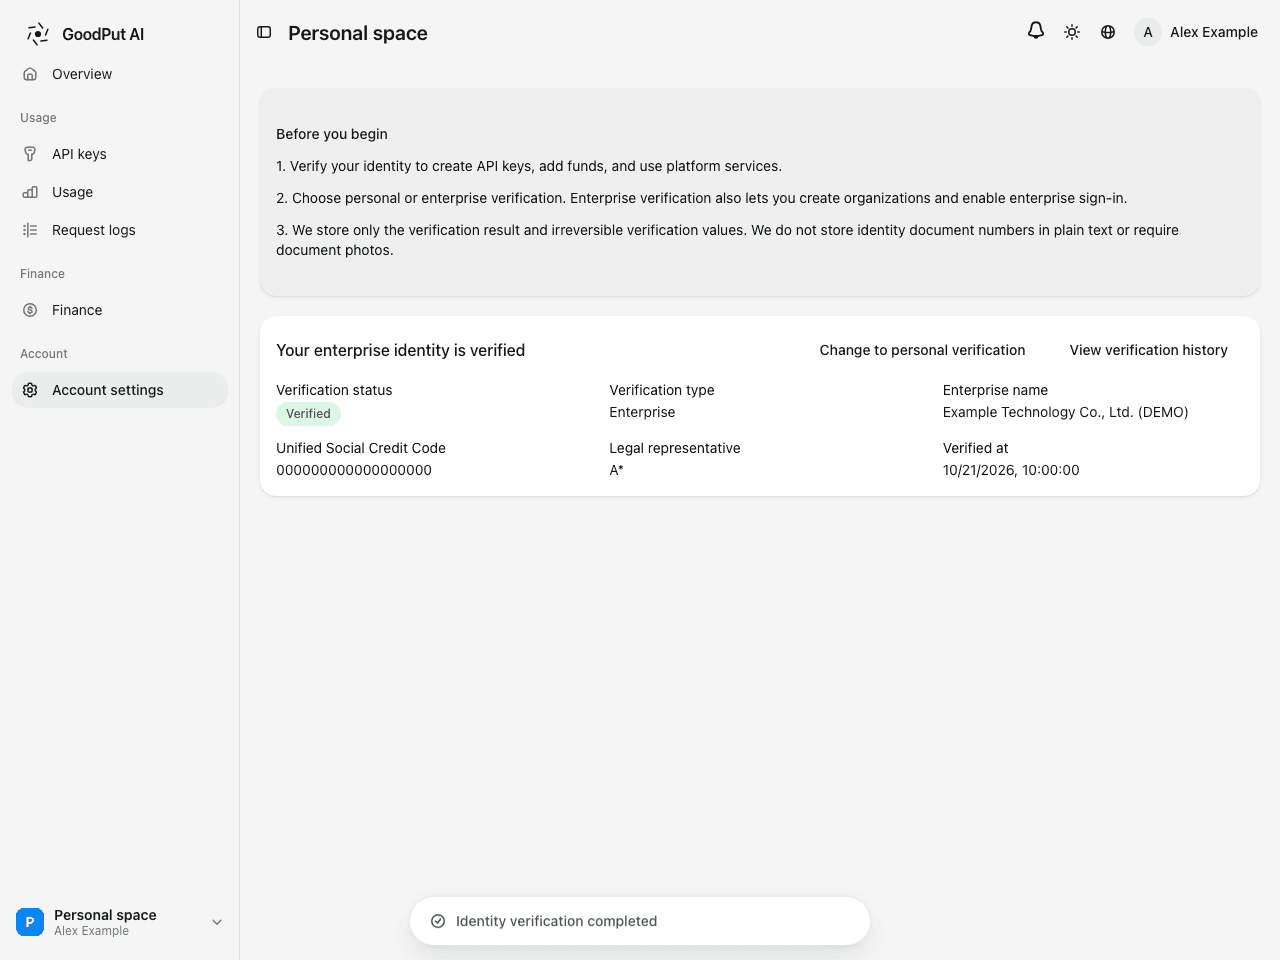
If the account already has personal verification, select Change to Enterprise Verification and submit enterprise details using the same steps.
Step 2: Create an organization
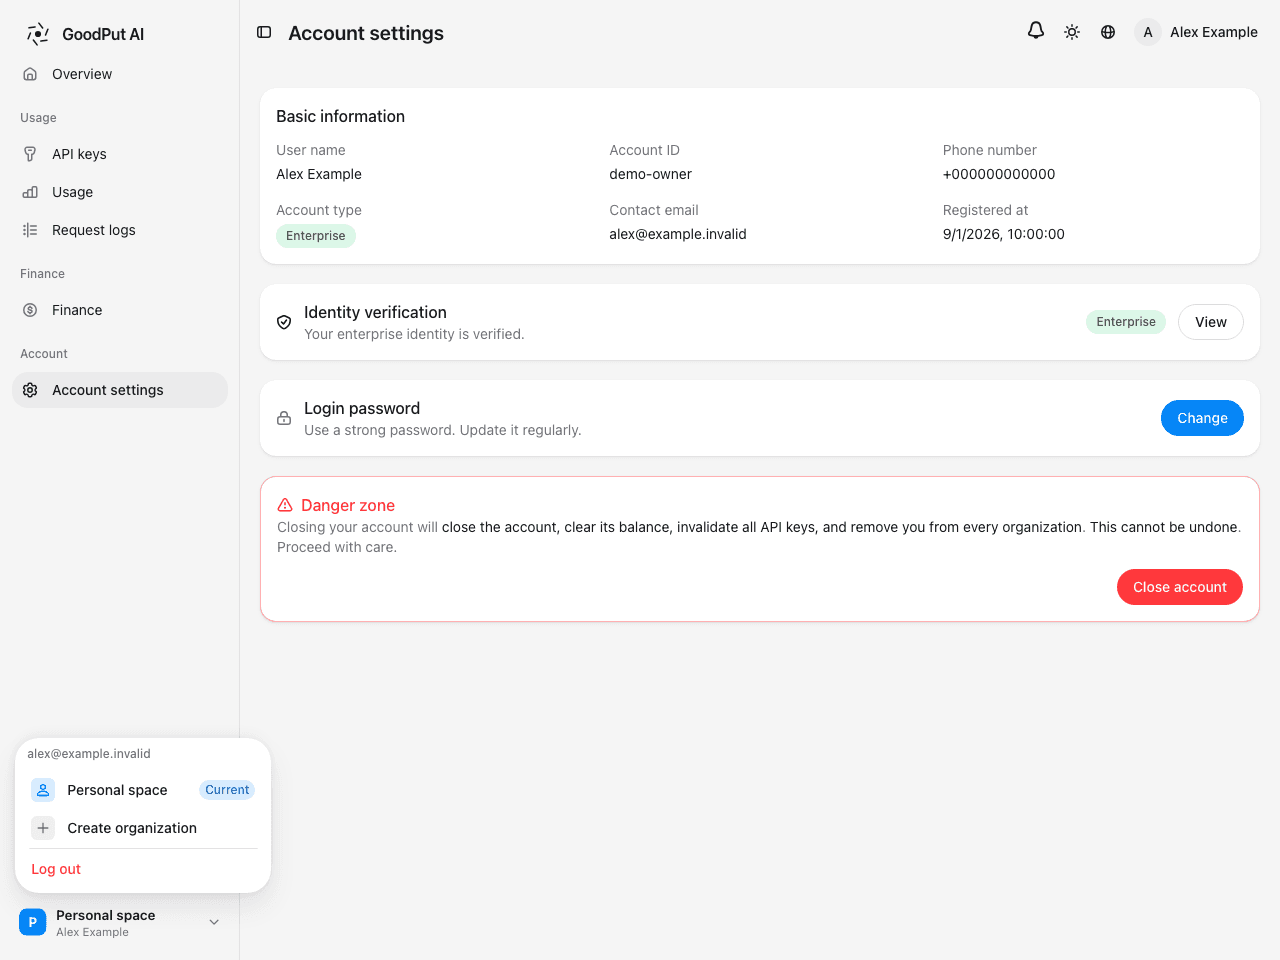
Enter organization details
Enter an organization name and slug, then select Create Organization. On success, the console opens the new organization.
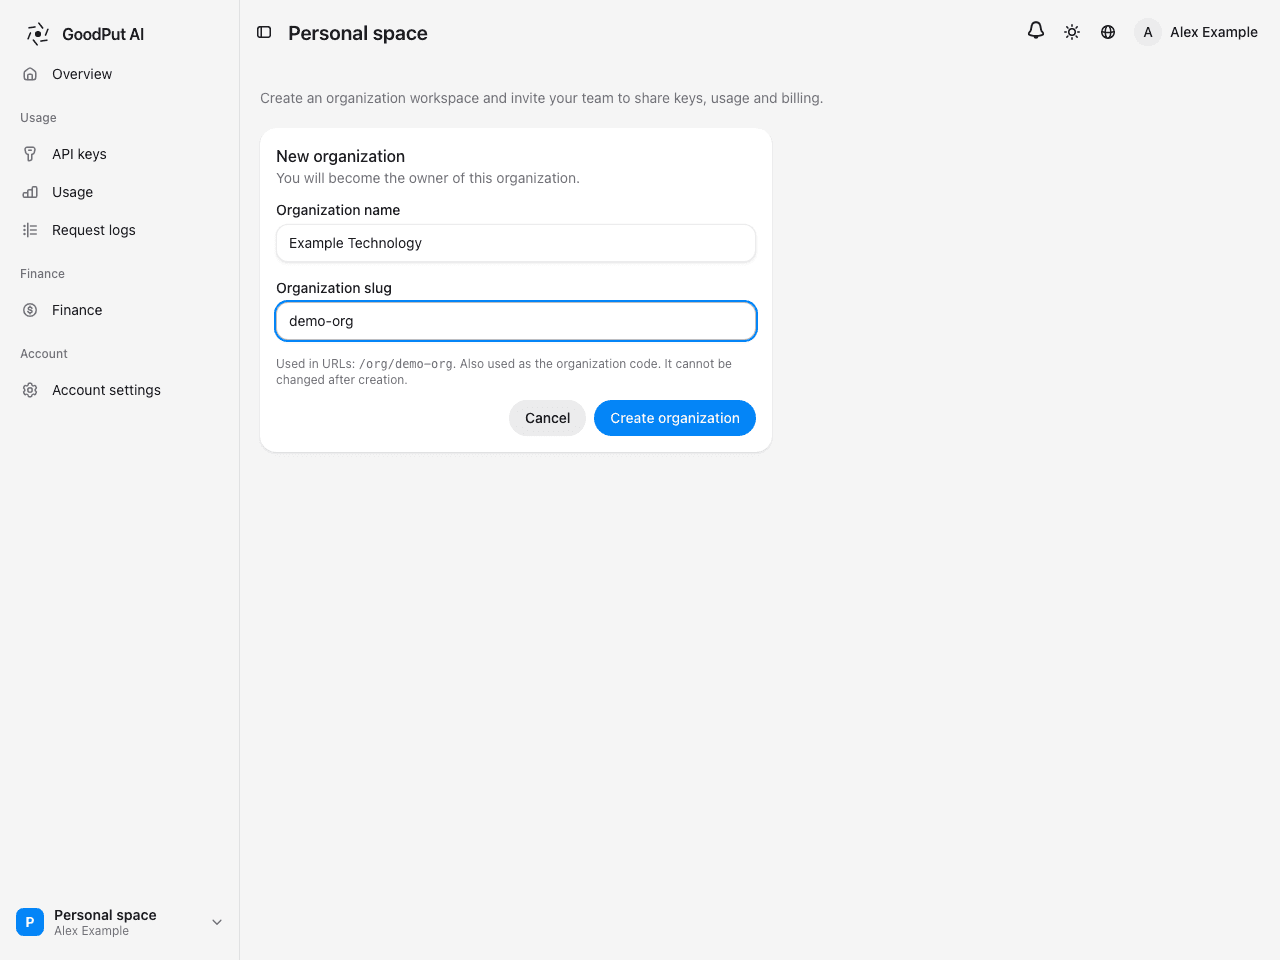
- The slug contains 3–64 lowercase letters, digits, or hyphens, appears in URLs, and cannot be changed after creation.
- At creation, the platform records your current enterprise verification details, including the name and credit code, as the organization’s enterprise identity. Later account-verification changes do not alter existing organizations.
Step 3: Open a dedicated transfer account
Only organization owners and administrators can use Finance. Ordinary members do not see the recharge entry.
Open Add Funds
In the organization sidebar, select Finance → Add Funds. You can also use Top Up at the upper right of the finance overview.
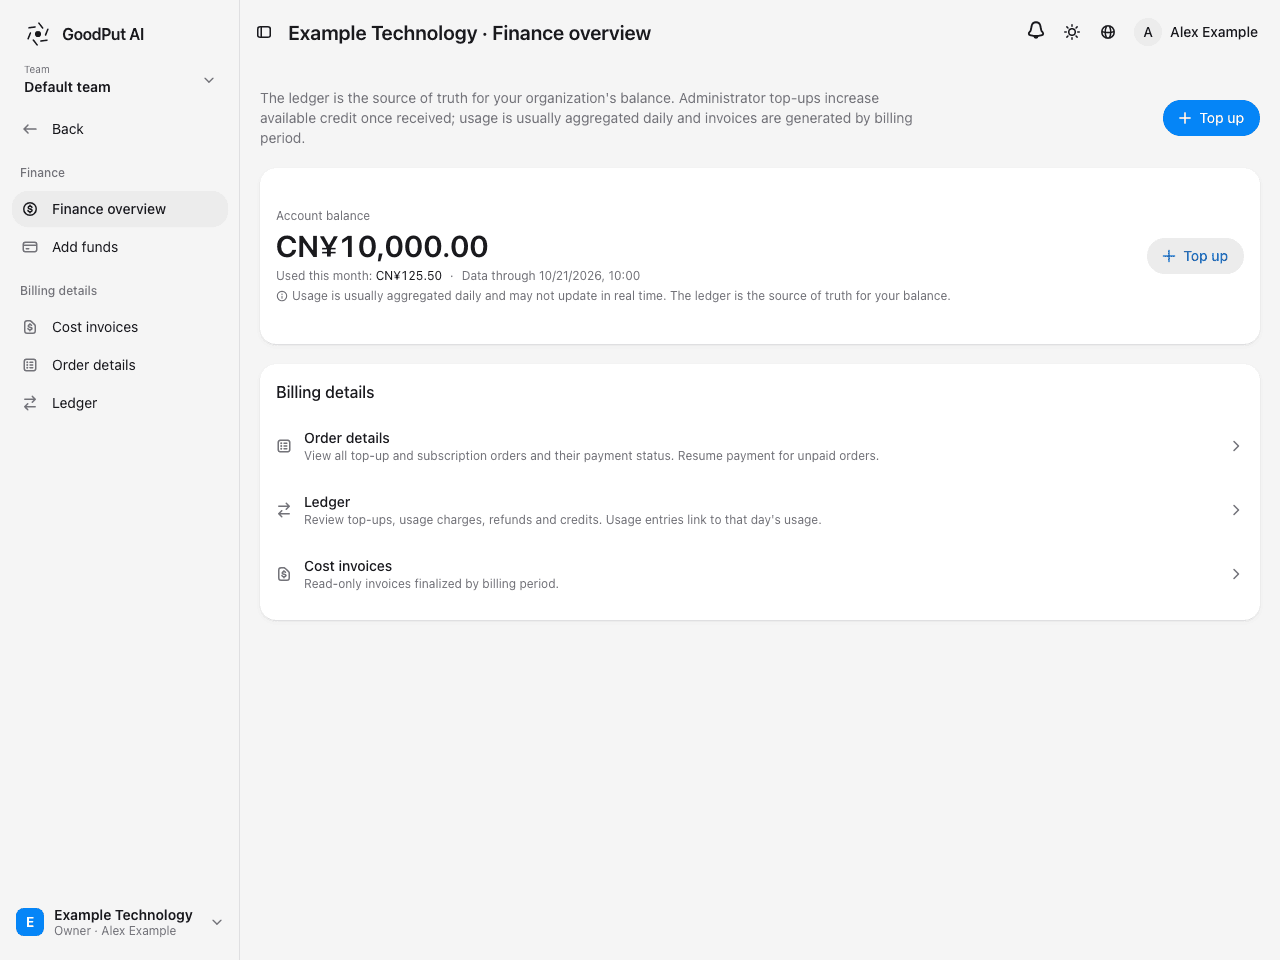
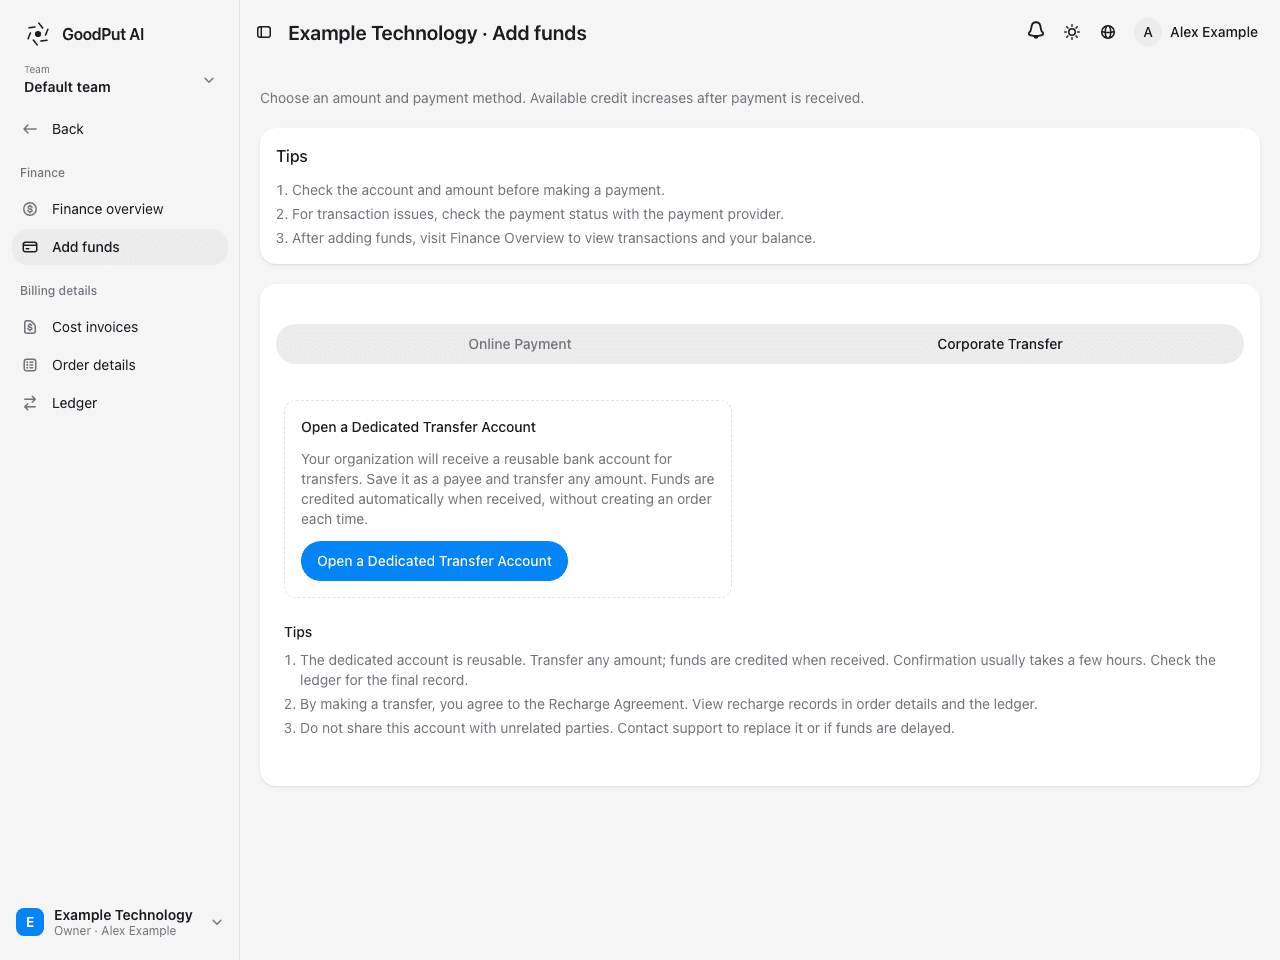
Obtain payment details
After activation, the page continuously displays the organization’s dedicated account:
| Field | Description |
|---|---|
| Beneficiary account, dedicated to your organization | The bank-assigned account for this organization, reusable without expiry |
| Beneficiary name | 杭州词元之芯科技有限公司 |
| Beneficiary bank | 交通银行杭州华浙广场支行 |
The registered Chinese beneficiary and bank names above must be used as displayed in the live console. Select Copy Payment Details to copy all fields and share them with your finance team.
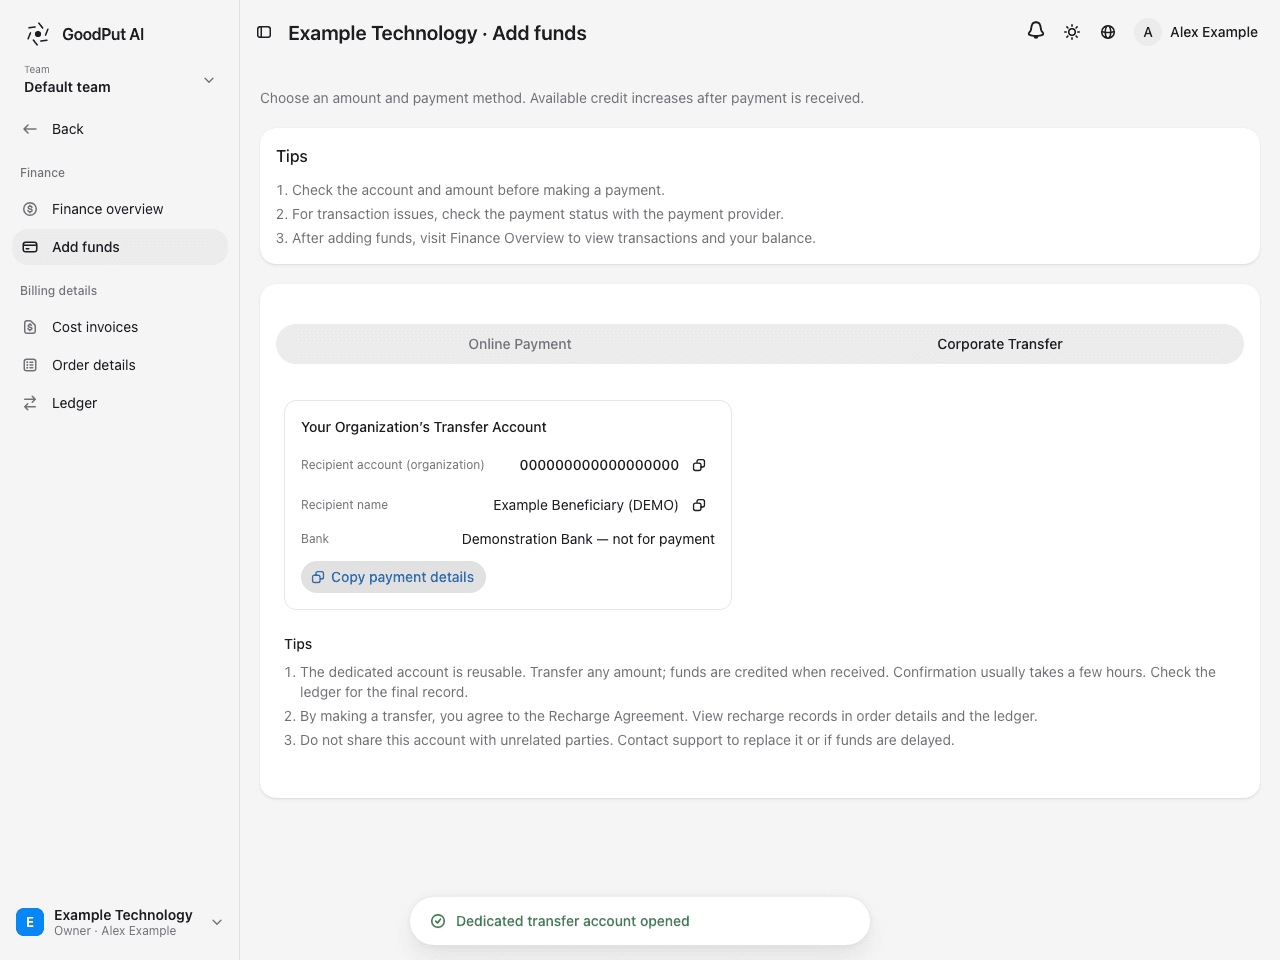
- Each organization has one dedicated account. Returning to this page shows the same one.
- The account identifies only your organization. Do not share it with unrelated third parties. Contact support if it needs replacement.
Step 4: Make the bank transfer
Finance staff transfer to the dedicated account through enterprise online banking or at a bank branch:
| Banking field | Value |
|---|---|
| Beneficiary account | The dedicated account shown in the live console; it differs by organization |
| Beneficiary name | 杭州词元之芯科技有限公司 |
| Beneficiary bank | 交通银行杭州华浙广场支行 |
| Transfer amount | Any amount; the amount received is credited |
| Purpose / reference | No order number needed; the account identifies the organization |
- If banking asks for bank and branch separately, select “交通银行” and “杭州华浙广场支行”.
- Save the account in the bank’s beneficiary list for reuse.
- The beneficiary account determines the organization receiving credit; the payer account is not restricted. Using your enterprise’s own account is recommended for reconciliation.
For a single transfer over ¥1,000,000, contact support for confirmation before arranging payment.
Step 5: Confirm crediting
When funds arrive, the system automatically:
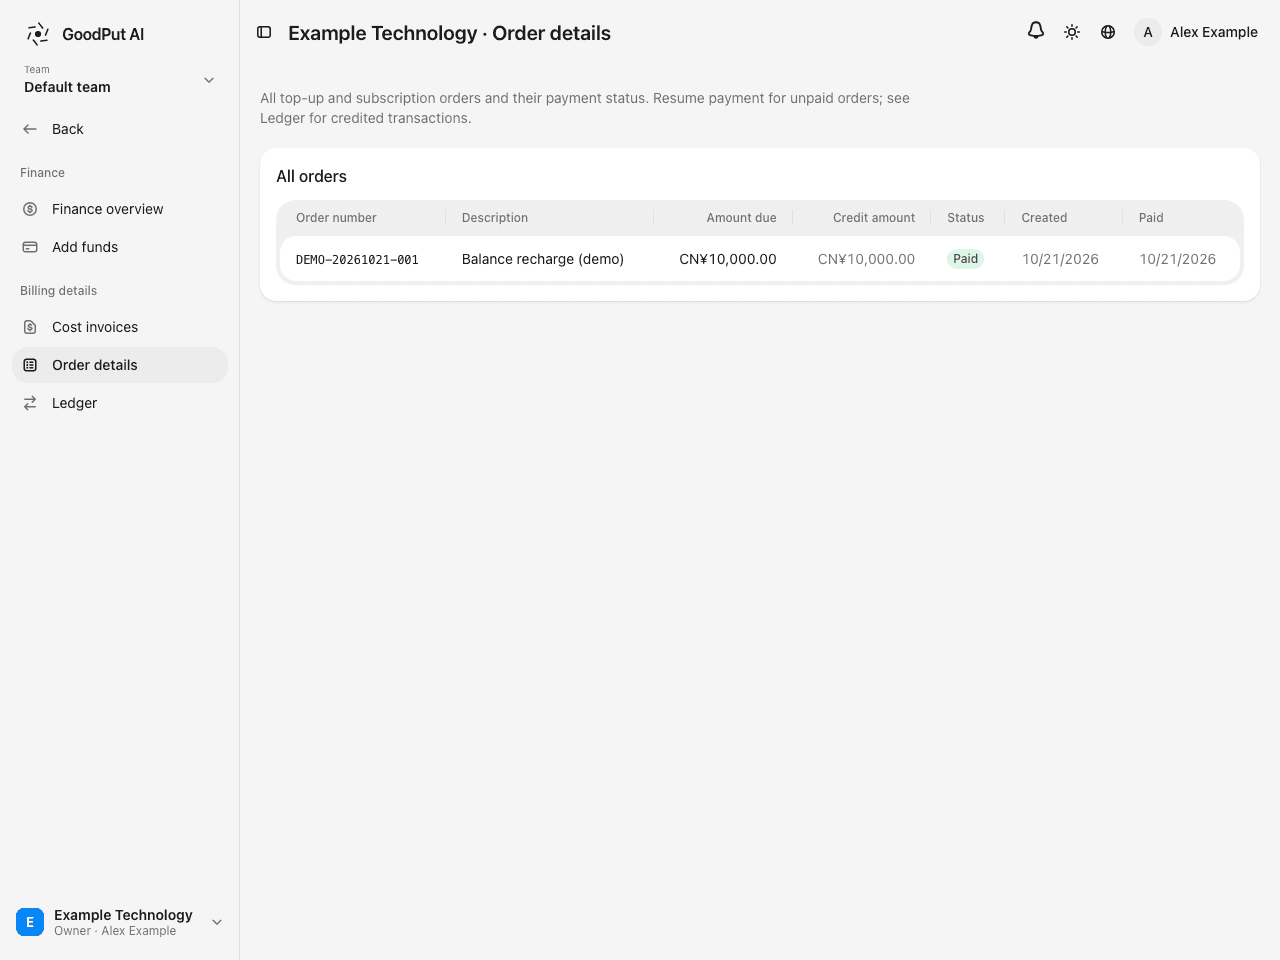
- Creates a paid Balance Recharge order for the amount actually received.
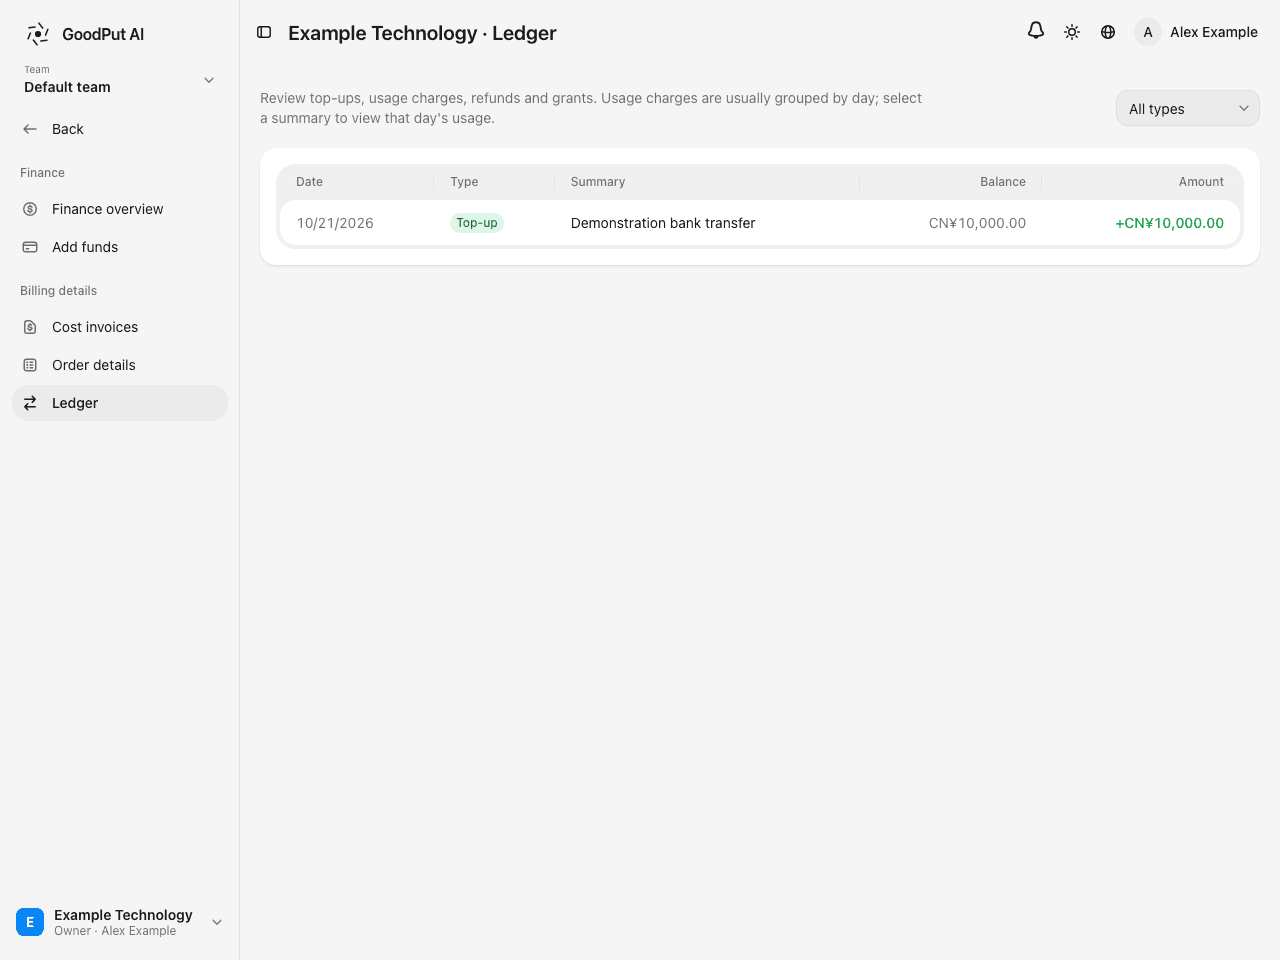
- Credits the same amount to the organization balance and records it in the ledger.
Confirmation usually completes within a few hours, depending on the bank transfer’s arrival time. The ledger is the final record.
View the automatically generated recharge order under Finance → Order Details:
View the recharge and updated balance under Finance → Ledger:
If keys were frozen because the organization ran out of funds, they resume automatically after crediting. You do not need to recreate API Keys.
FAQ
I cannot find Finance or Add Funds in the organization
These features are available only to owners and administrators. Ask the owner to make you an administrator, or have an owner or administrator perform the operation.
Corporate Transfer is disabled and marked Coming Soon
The channel is not currently enabled. Contact support.
Opening the account says an owner or administrator is required
Your current account is an ordinary member. Ask an owner or administrator to open it.
Organization creation requires enterprise verification
The account is unverified or has only personal verification. Complete step 1, then create the organization.
The transfer has not been credited for a long time
- Check that the beneficiary account exactly matches the dedicated account in the console.
- Confirm that your bank successfully debited the transfer.
- If it still has not arrived, provide the bank receipt, payer account, amount, and transfer time to support.
Can I get an invoice?
Yes. Contact us with the organization name and invoicing details. See bills and invoices.
Can I fund a personal space by bank transfer?
Yes, through a different workflow. Personal-space offline transfers use one account per order: enter an amount, create an order, then obtain that order’s beneficiary account. The transfer must exactly match the order amount for automatic confirmation. The order has a payment deadline shown on the page. Enterprises making repeated payments should use an organization’s dedicated account.